Making and Modifying Connections
This guide explains what happens when you click on pins or cable cores to create, extend, or change connections in Splice.
Connection Scenarios
Creating a New Connection
-
Click an unconnected pin on a connector block.
The Pending Wire banner appears at the bottom of the screen.
-
Click a second target:
- Connector pin - a wire is created using the pending specs (AWG, color, etc.).
- “TIN” / “BARE” / “HS” flying-lead port - a flying lead is created with the same specs.
- Cable core - a cable core segment is created using the cable core’s own specs (AWG, color, strand count, etc.), and linked to the pending wire.
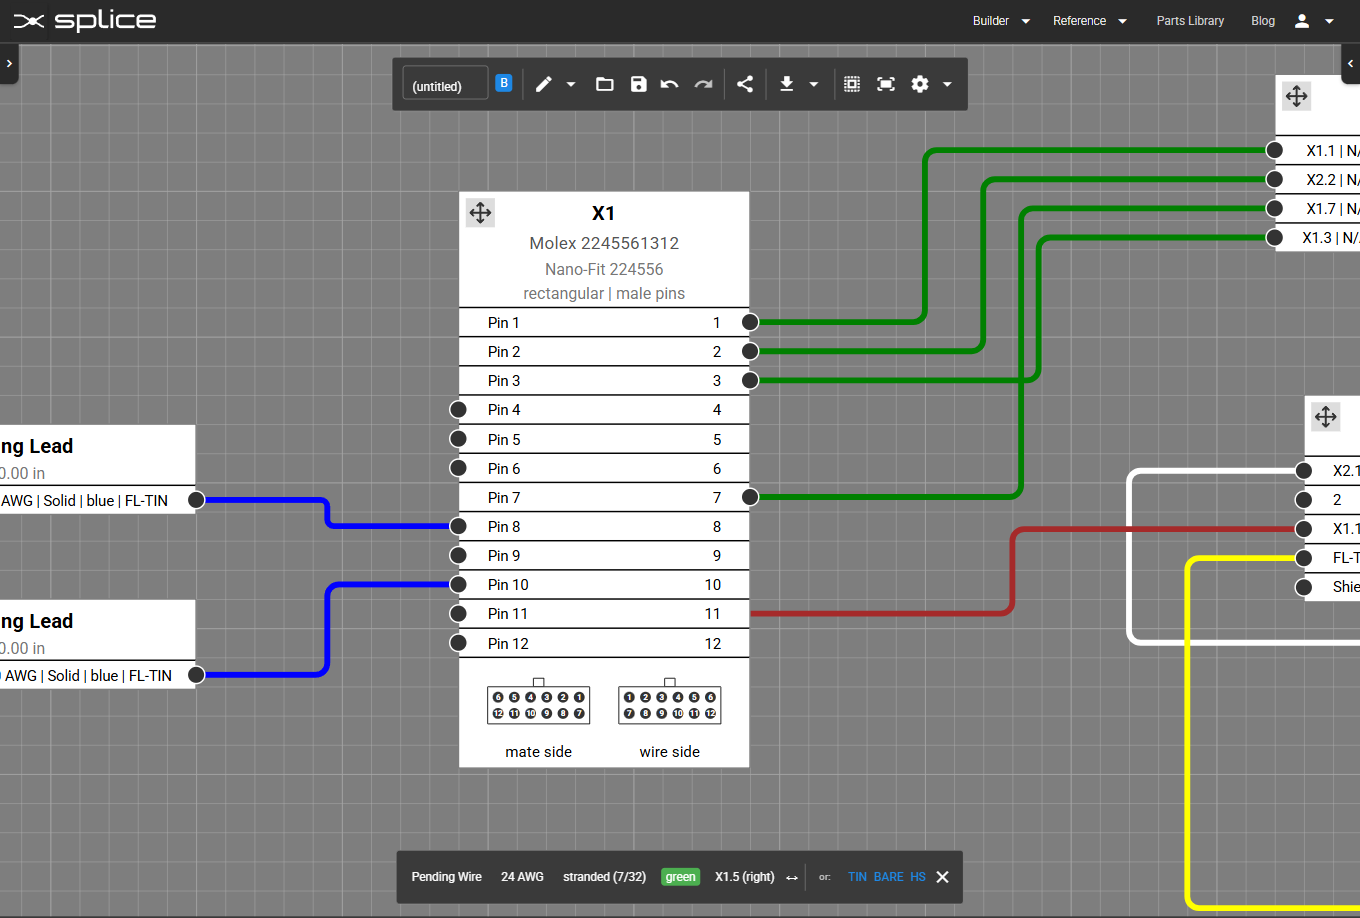
Create a new connection by clicking an unconnected pin, then a connector pin, flying-lead port, or cable core.
Adding an Additional Connection
-
Click a pin with one or more existing connections.
An action menu appears.
-
Select “Add Connection.”
You enter Pending Wire mode again.
-
Complete the connection: Click the target pin or core to finish the new wire or lead.
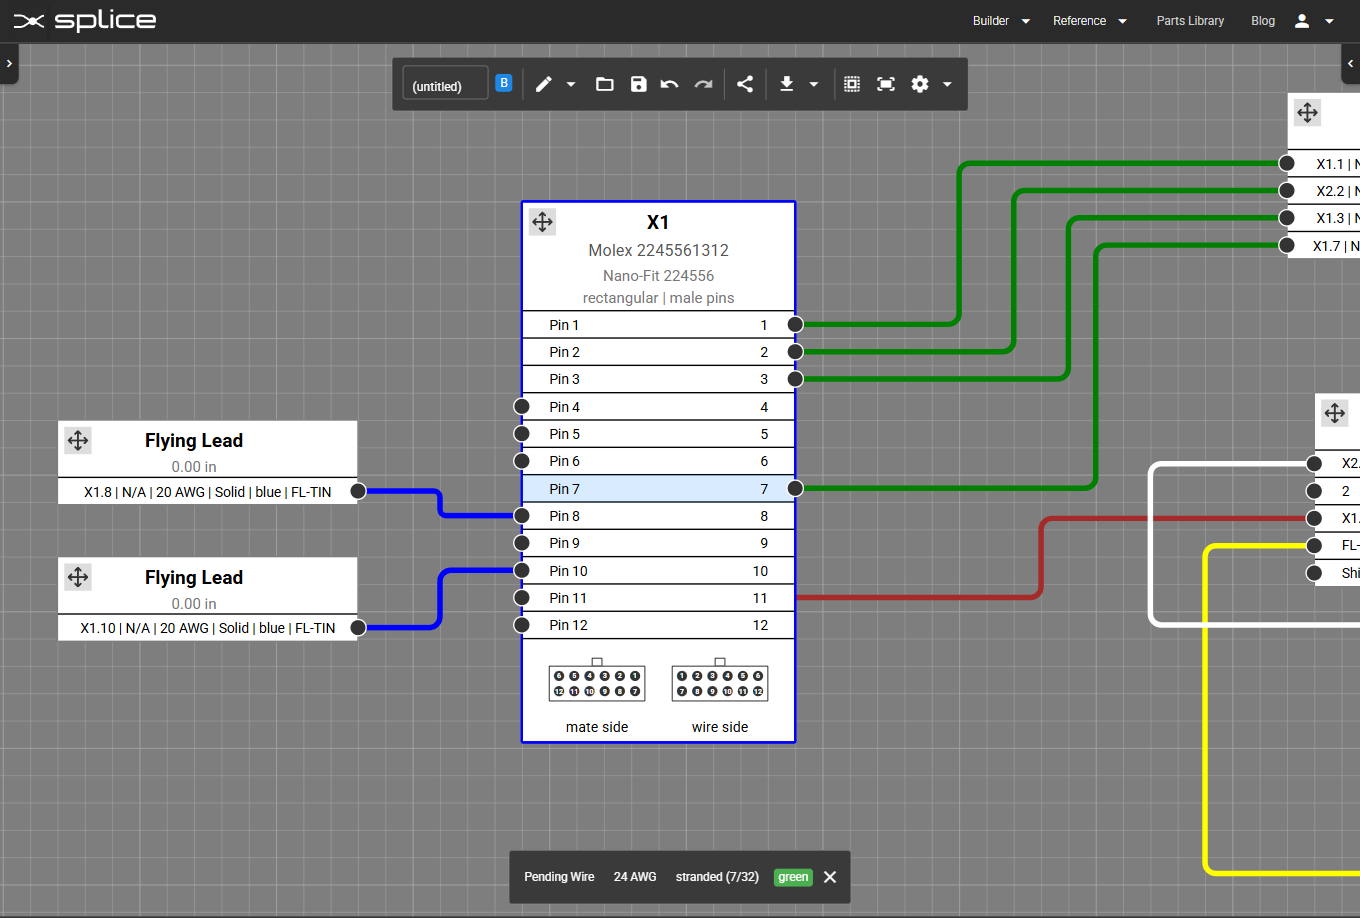
Click the pin you want to extend, then choose “Add Connection.”
Select “Add Connection” to start a new wire from the same pin.
Example: a new flying lead added to pin X1.7.
Moving or Swapping an Existing Connection
-
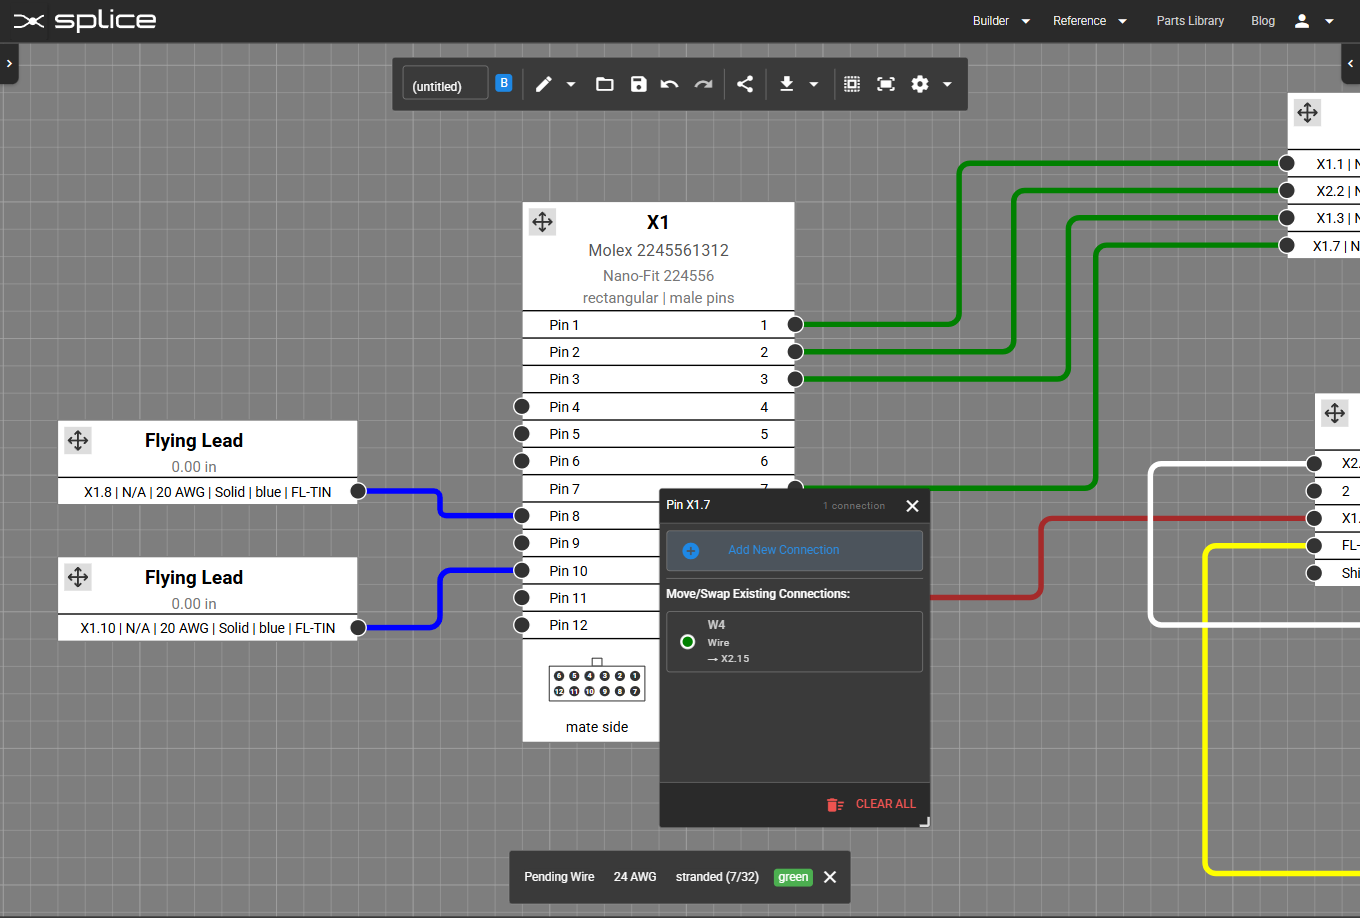
Click a pin with connections.
The action menu opens.
-
Choose the wire you want to move or swap in the “Move/Swap/Twist Existing Connections” block.
Open the action menu on the pin whose connection you want to move or swap.
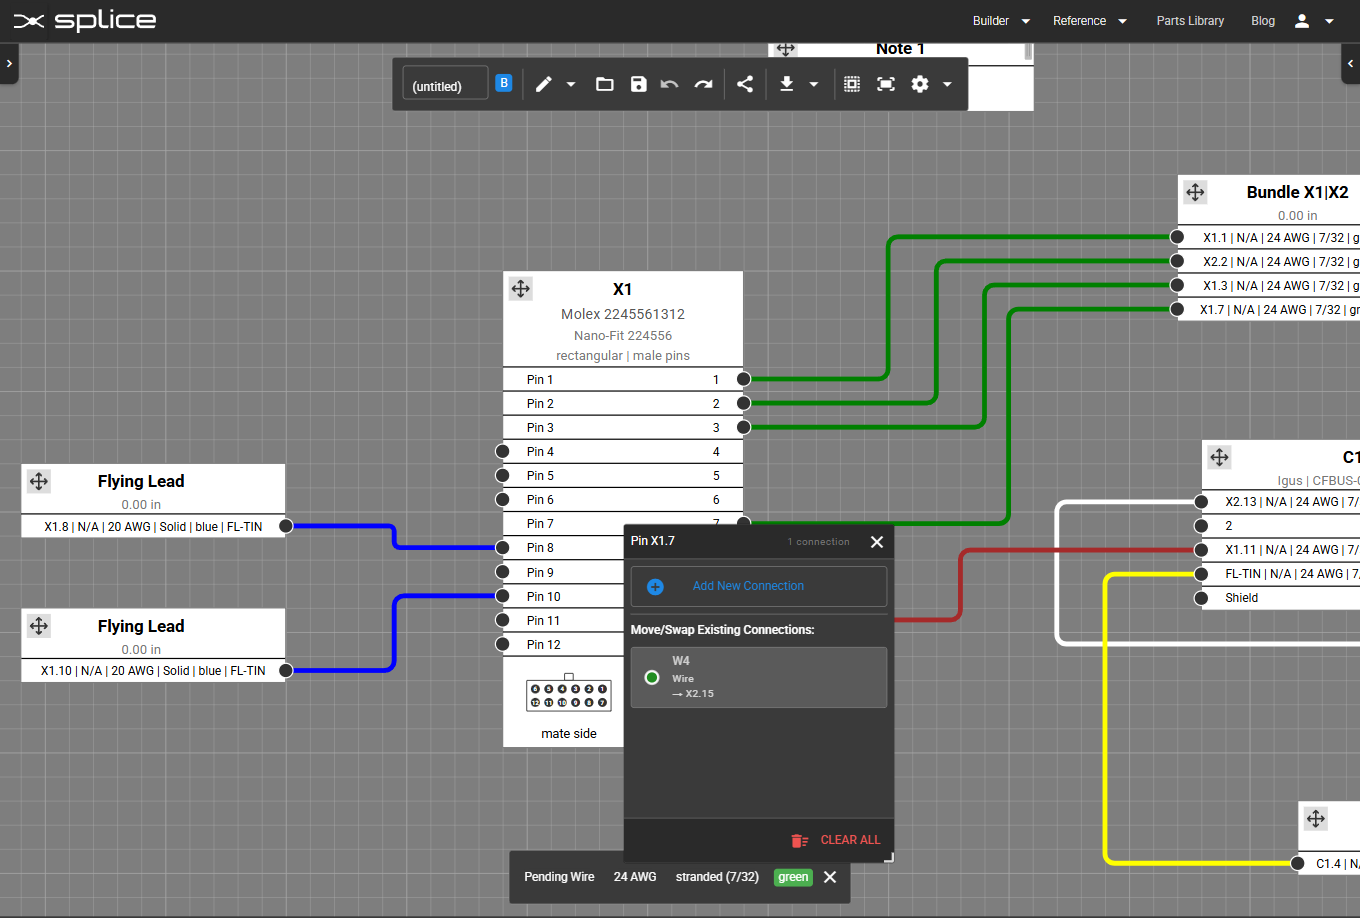
Choose “Move” to relocate the wire, or “Swap” to exchange it with another connection.
Move vs. Swap Examples
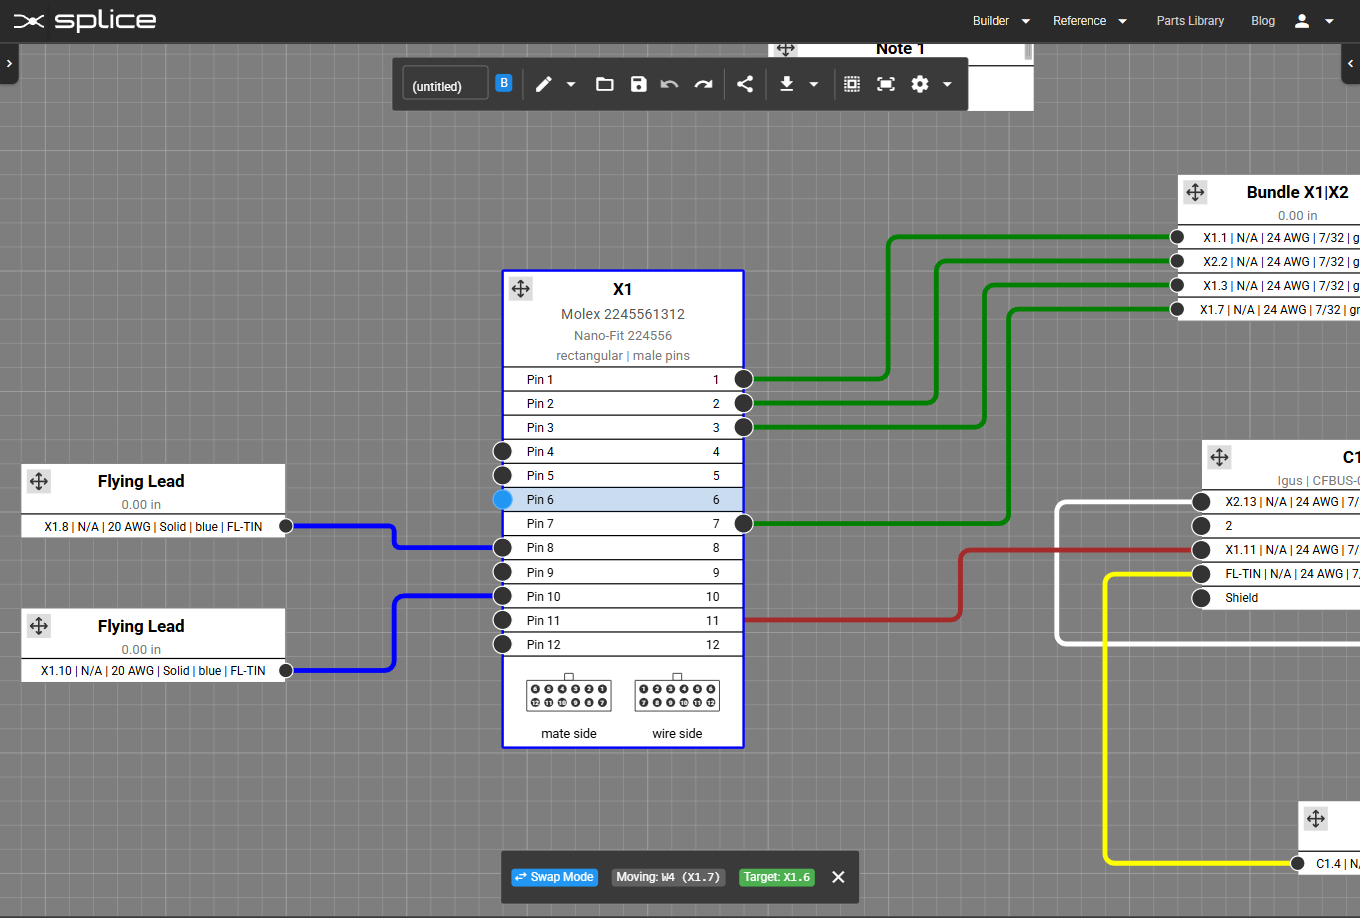
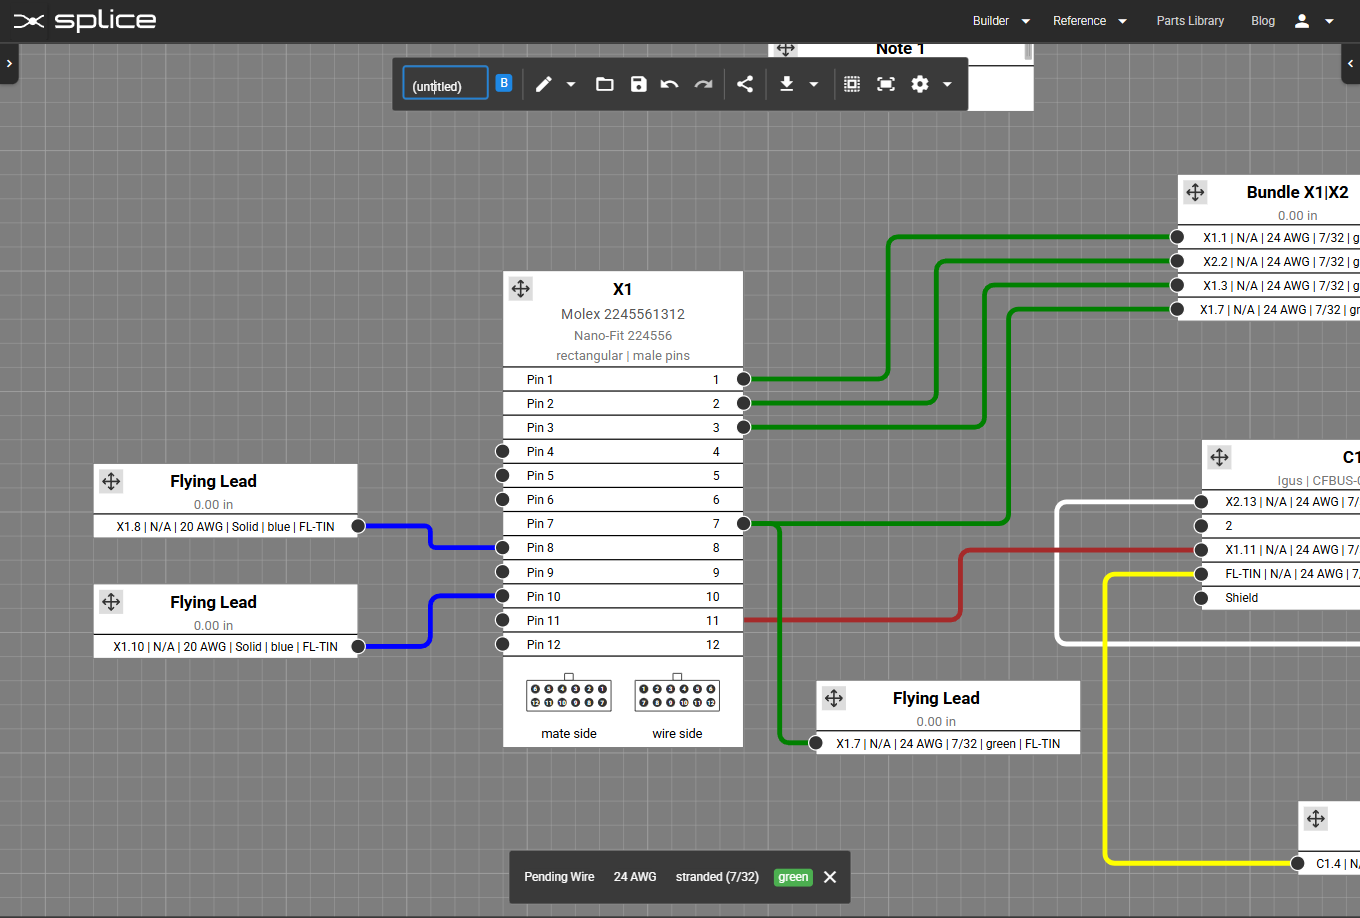
Move to X1.6: wire relocates directly since the target pin is empty.
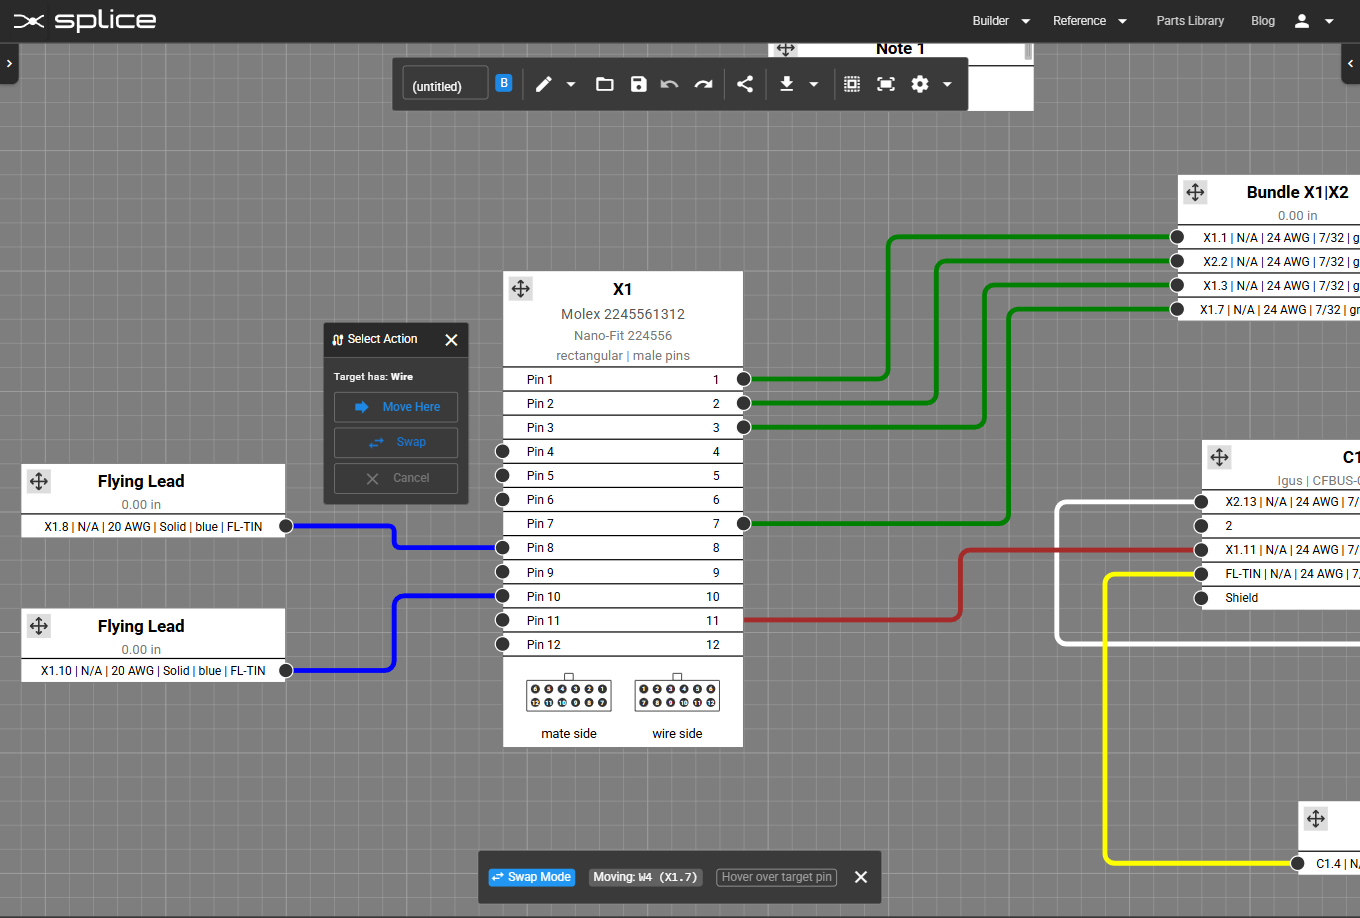
Clicking X1.3: the target pin already has a connection, so you can move or swap.

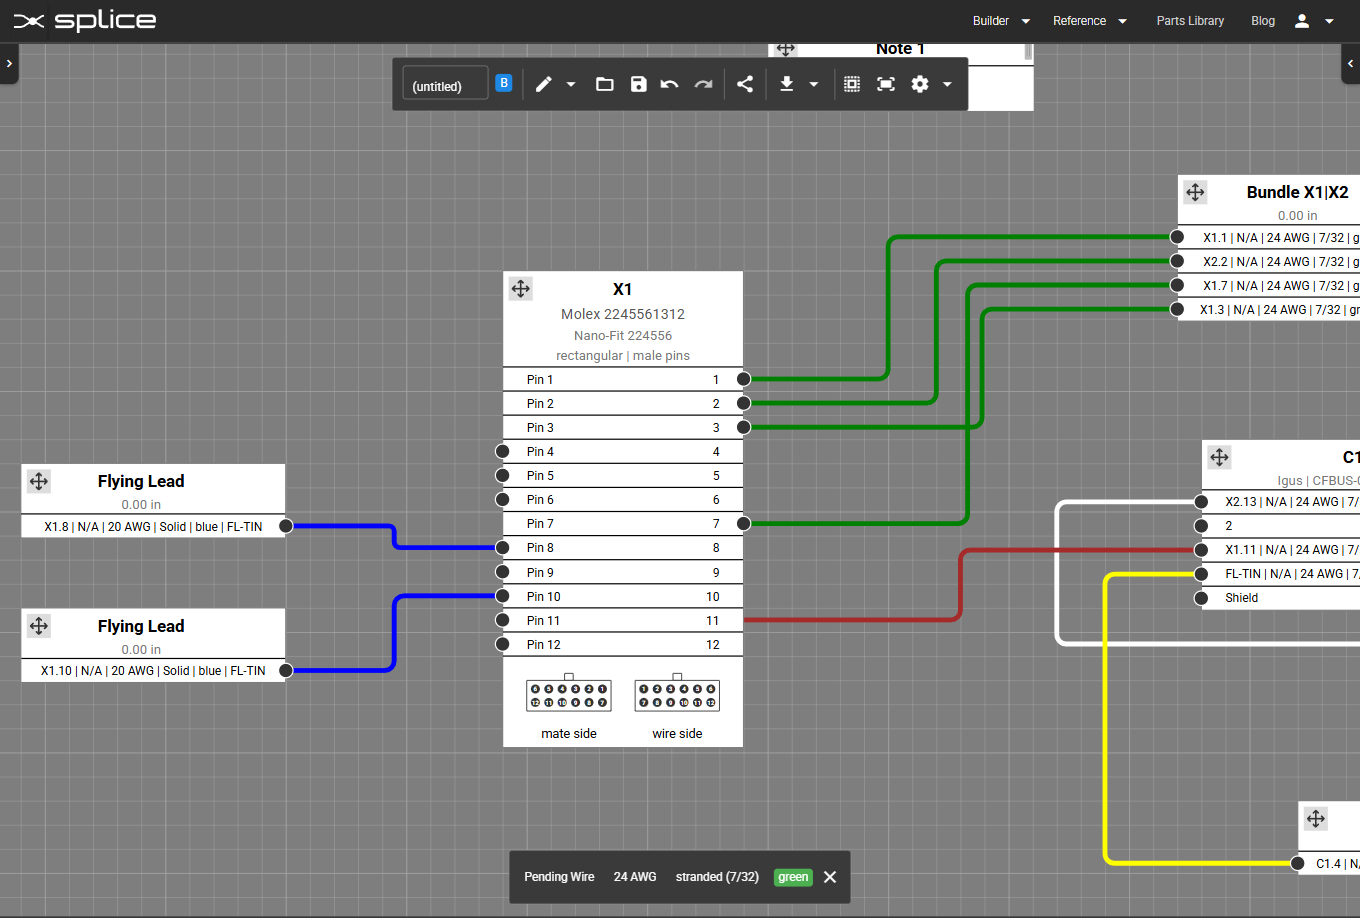
Move result: X1.7 → X1.3.
Swap result: the original wire on X1.3 moves to X1.7, and vice versa.